📖
Microweber User Guide
  • Introduction
  • How to remove footer link
  • How do I map my own domain to my website?
  • How do I get into cPanel for hosted websites?
  • Error 500 - Internal Server Error
  • Installation Steps - White Label
  • How can I switch from the personal plan to the free plan?
  • Where routing is defined for module?
  • What's the difference between microweber.com and microweber.org
  • How to use the white-label license on my own server?https://whitelabel.microweber.com/
  • Can I download all purchasable templates, if I purchased a Subscription then?
  • Unfortunately, I deleted my parent page and I lost my data, can I recover that?
  • I can't see any photo I upload in the file manager neither when I'm using it with the gallery.
  • How to change currency?
  • How to transfer the files and database to another hosting and another domain?
  • How to develop a local payment gateway in Egypt?
  • How to download templates?
  • Is it possible to have Multiple Currencies in the shop?
  • How can I change images on the MW template?
  • Can't duplicate or clone a feature field?
  • How to disable experimental for assets loading.
  • How to download the Guest House template?
  • A stripe token is required.
  • Do we support .energy domains?
  • How to remove shopping cart icon?
  • How can I create a new admin user?
  • Does Microweber supports Paypal Pro
  • Error after installing Plugin on Plesk.
  • How to update template
  • How to embed iframe on a page
  • How to edit the order email
  • How to activate and use the White label module
  • How to cancel my account
  • How to add new page
  • How to create new Website
  • Can I access my domain after it's expired?
  • How to publish your site
  • How to add new Products
  • How to integrate calendly to your Microweber website
  • How to integrate Google analytics to your Microweber website
  • How to install the Microweber plugin in Plesk
  • How to add meta tags to your new MW website
  • Account Upgrade
  • Adding Page
  • Live edit - How to Edit you site
  • Live edit – Essentials, How to type text and open module settings
  • Live edit- how to add pictures gallery
  • Live edit- how to add title and paragraph
  • Live edit - How to change module skin
  • Live edit - How to add video
  • Live edit - How to add single picture
  • Live edit - How to add contact form
  • Live edit - How to access module settings
  • Live edit-How to add button
  • Live edit: How to add google maps
  • How to add pictures to post or product
  • How to add products with prices and custom fields
  • How to add post
  • How do I earn money through the affiliate program?
  • Live edit - How to enter and exit preview mode
  • Live edit – How to insert new module
  • Live edit - How do delete module
  • Live edit – How to delete a layout
  • How to add meta tags
  • How to change primary button colors
  • How to reload modules
  • How to reset page content to its default state
  • How to manually update Microweber
  • How to change page link
Powered by GitBook
On this page

Was this helpful?

How to add meta tags

PreviousLive edit – How to delete a layoutNextHow to change primary button colors

Last updated 1 year ago

Was this helpful?

  1. Accessing the Microweber Admin Panel:

    • Log in to your Microweber website's admin panel. Typically, you can access it by adding "/admin" to your website URL and entering your login credentials.
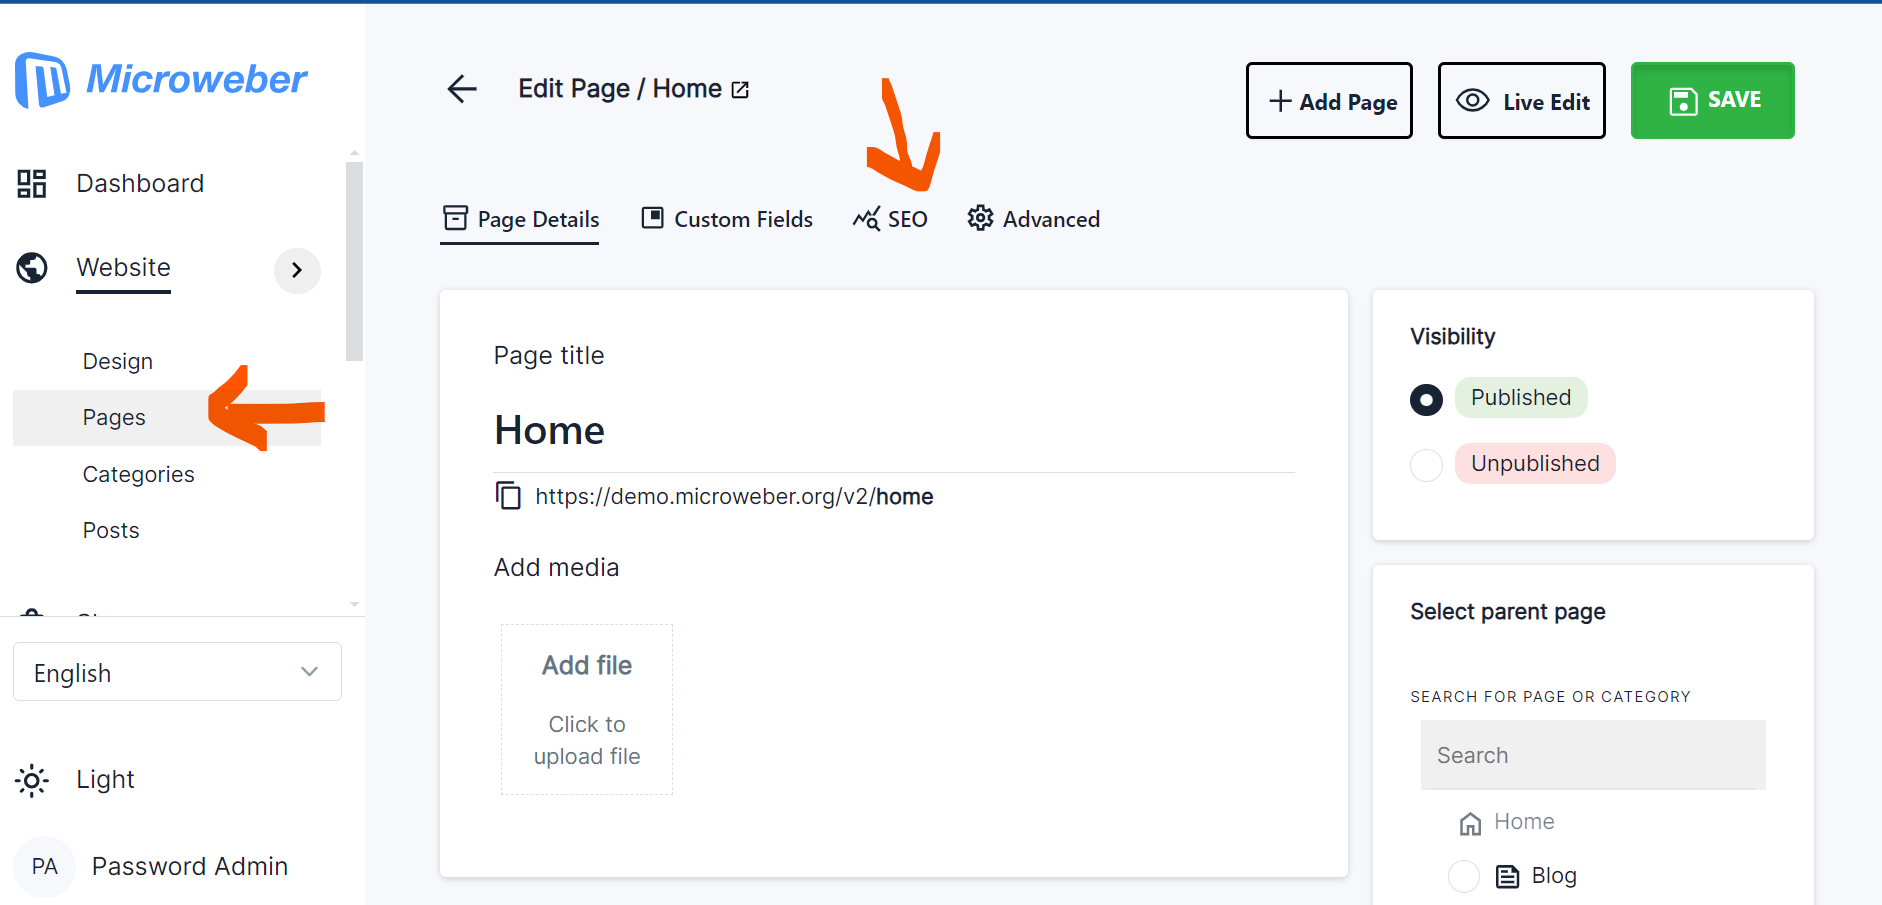
  2. Navigating to the Page You Want to Edit:

    • Once logged in, navigate to the page where you want to add or edit meta tags. You can do this by clicking on the "Pages" option in the admin panel's menu and selecting the desired page from the list.

  3. Editing the Page:

    • Once you're on the page you want to edit, click on the "Edit" button or select the page and then click on the "Edit" icon.
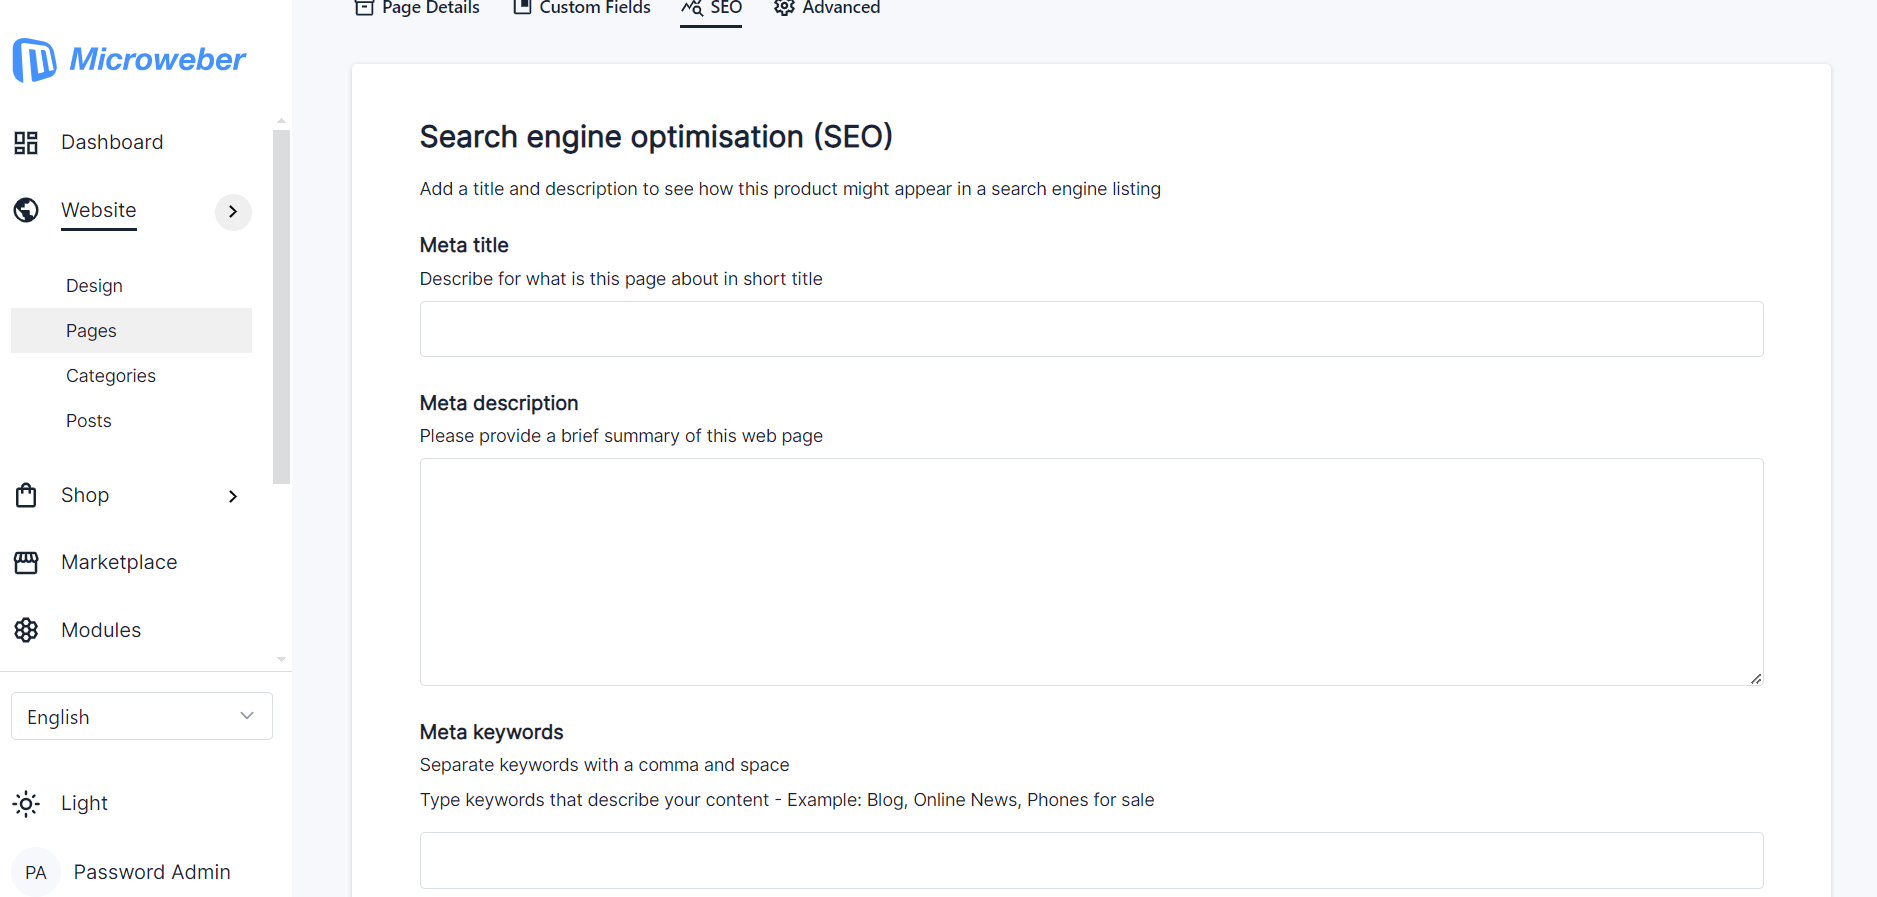
  4. Adding Meta Tags:

    • In the page editor, look for options related to meta tags. Microweber typically provides fields for adding meta title, meta description, and meta keywords.

    • Enter your desired meta title, meta description, and meta keywords in the respective fields. Make sure to use relevant keywords and keep your meta description concise and engaging.
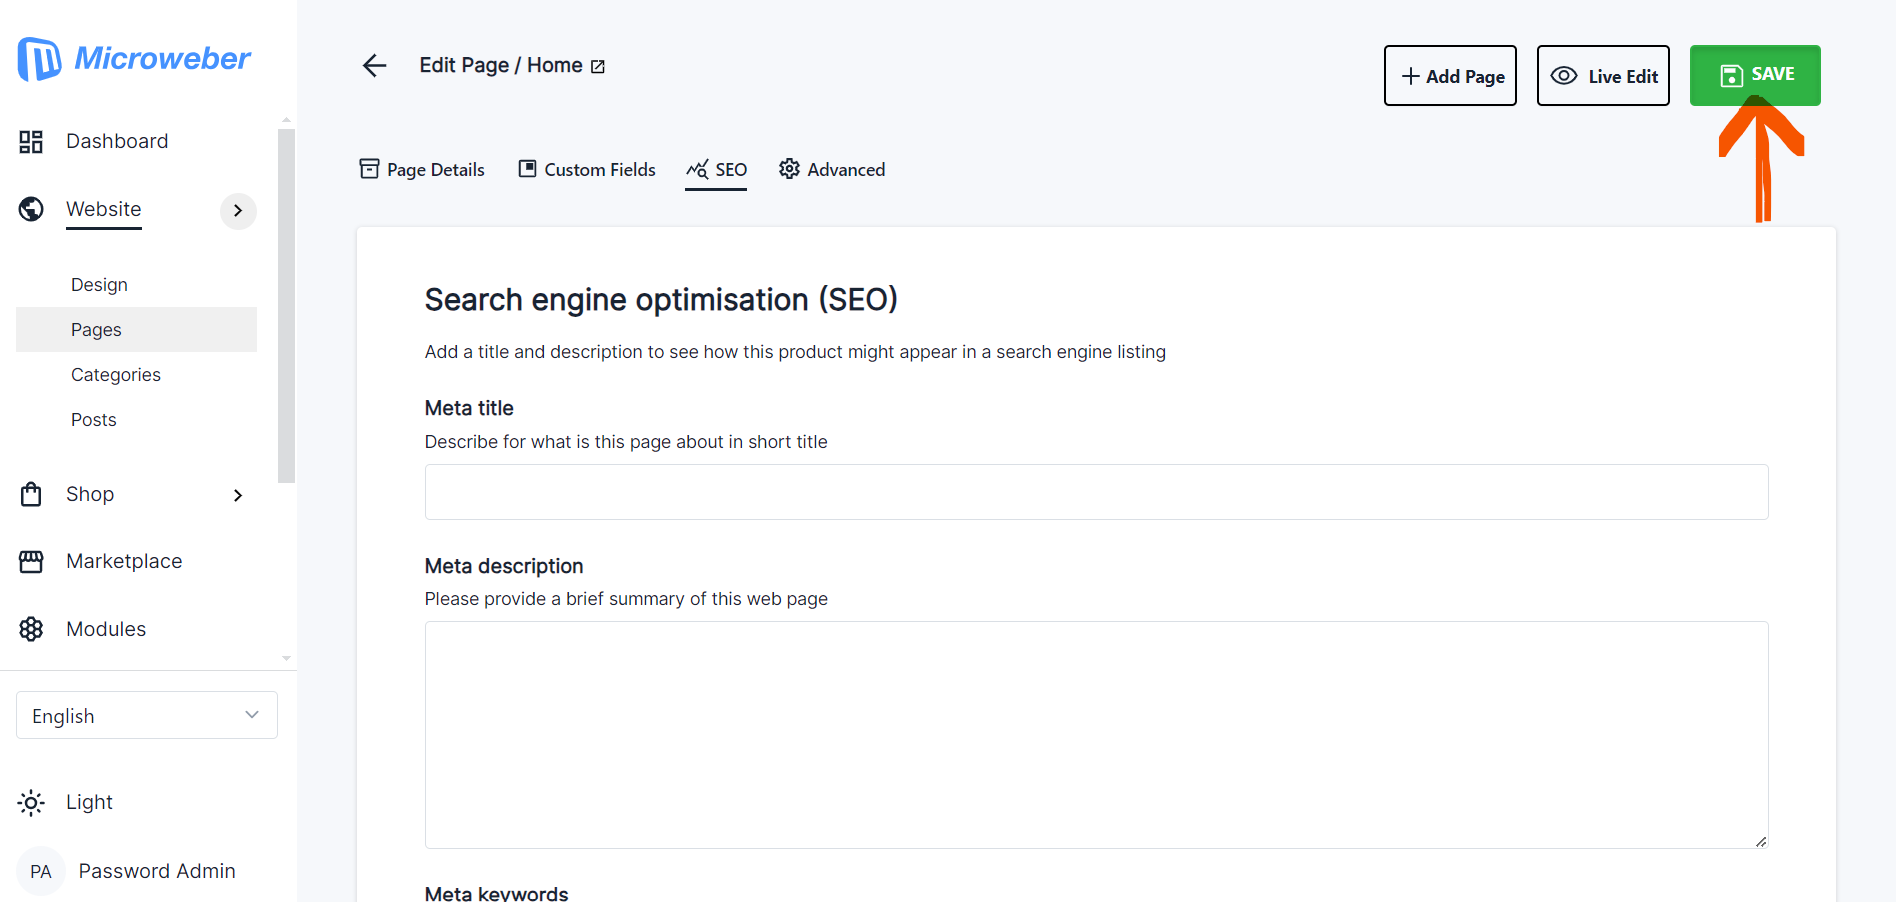
  5. Saving Changes:

    • After adding or editing the meta tags, make sure to save your changes. Look for a "Save" or "Update" button in the page editor and click on it to save your meta tag modifications.

  6. Preview and Publish:

    • Before publishing the changes, it's a good idea to preview the page to see how the meta tags will appear in search engine results. Microweber usually provides a preview option for pages.

    • Once you're satisfied with the changes, publish the page to make the updated meta tags live on your website.

  7. Repeat for Other Pages (Optional):

    • If you have multiple pages on your Microweber website, repeat the above steps for each page to ensure that all pages have optimized meta tags.

  8. Additional Tips:

    • Ensure that your meta tags accurately reflect the content of each page.

    • Avoid keyword stuffing and focus on providing valuable and relevant information.

    • Regularly review and update your meta tags to keep them aligned with your website content and SEO goals.

By following these steps, you can effectively add and optimize meta tags for your Microweber website, improving its visibility and search engine rankings.